|
|
|
|
The few foes you can fight are some kobolds (near Drogan's home, in his barn and in the old farm). The village guards and dogs have already done a good job concerning the fleeing kobolds, and they can help you in case you cannot harm yet the few you'll find. |
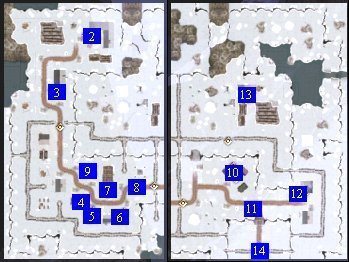
 This
is a two-parts village (west & east), where you can find some opportunities
to fulfill small quests and to fight a few foes in order to test your
new PC, and maybe one of the two henchmen that you can get there.
This
is a two-parts village (west & east), where you can find some opportunities
to fulfill small quests and to fight a few foes in order to test your
new PC, and maybe one of the two henchmen that you can get there. |
Taking on a henchman Now have a look at the possible henchmen to help you: Xanos or Dorna. Though taking one is not an obligation, do not forget that they won't take anything from you - not even XPs, and that they might give you good advice, which is a novelty with SoU. You also can get rid of them anytime. A very good novelty too is that you now have access to your henchman's inventory. Through it you'll be able to better equip him/her and you can change his/her weapons range anytime by changing them in the usual slots. One last point: you can share your load with him/her! Mischa is not a possible henchman as she is supposed to defend Drogan's house. If your PC is not a warrior, you'll have nevertheless to manage with a sorcerer/barbarian or a rogue/cleric - but don't doubt, they are anyway far more sturdy as you are, even for a level 1! You can at once ask them questions about themselves. They won't be telling much, but it will give you a glimpse at their mood. If you have not done so already, explore the first floor (the apprentices' quarters), or more precisely have a thought about the four footlockers, each one in a room, considering that you have already explored your own. You might find some useful items, or at least saleable items, though opening your comrades' footlockers will make you shift to chaotic for one point each time, except for your henchman's. Mind that Xanos' is trapped (slowing you for a while) and locked, that Dona's is locked too (both have got their key in their inventory if you need it), and don't overlook the mysterious locker (no evil point) which holds rags and the top of a toy. You can now explore the main floor. Take a few things on the kobolds
remains if you have killed some and try the kitchen crates which hold
meat, fish, garlic and belladonne. You can also notice a devining pool
in the same called room, where any quest item you might have lost will
wait for you. As for Drogan's walking stick, it will give your PC an
electric shock and you won't be able to pick it (I haven't tried a magician
PC yet.) It is time then to get to Drogan's laboratory. |
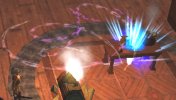
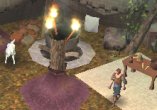
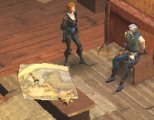
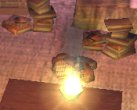
 You
cannot really enter the laboratory which is protected by a magic circle.
But Drogan's familiar - a faery dragon named Riisi - is keeping an eye
on his master's things and she/he (?) comes to you as soon as you try
to enter the circle.
You
cannot really enter the laboratory which is protected by a magic circle.
But Drogan's familiar - a faery dragon named Riisi - is keeping an eye
on his master's things and she/he (?) comes to you as soon as you try
to enter the circle.|
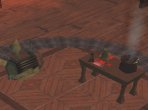
Drogan's room and private quarters
There you will find potions of healing and healer's kits inside the
medical supplies chest, plus a few interesting items inside the miscellaneous
supply chest (quartz crystal, empty bottle, gargoyle skull, slaad's
tongue, etc.). Do not forget the two racks where you will find whatever
weapon or ammunition you need to equip you PC, plus some you can sell
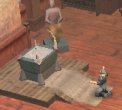
later. But the most interesting "containers" are certainly
the grinder and Drogan's crystal table. At the moment, the grinder is
only what you see, but it might become even more useful later. |
 With
the
With
the |
You can either put the three adequate crystals inside the grinder and wait, or interrogate Drogan's Crytal table with the same items in your inventory. The result will be found inside the grinder. When you have found the Alchemist Cooking
Book, you'll also know how to create a useful item with a few ingredients.
As for any Easter Egg, see here |
|
If you have not done so already, inquire about Drogan's heath after Ayala. She will tell you that she needs three ingredients to make a remedy for Drogan. Those ingredients are a tressym tongue, some charcoal, some helmthorn berries. You should find them at the village herborist's. Outside we go now! When you bring her back the three ingredients, Ayala will reward you with 300XP and Drogan's health will get from "badly injuried" to "barely injured" though you still will not be able to talk to him. |
|
There is nothing to collect here, though the XPs you'll get by killing those kobolds can help your PC leveling up.. |
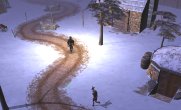
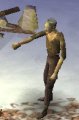
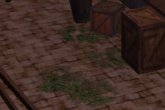
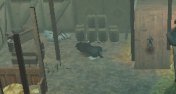 From
the tracks before this barn, you can guess that some kobolds might still
be inside, which is right. Mind the one(s) which could stand on top
of the slope at the back of the barn, as you cannot see it at once.
From
the tracks before this barn, you can guess that some kobolds might still
be inside, which is right. Mind the one(s) which could stand on top
of the slope at the back of the barn, as you cannot see it at once.|
When you have freed her half brother, she'll be only "half happy" with his return! If you have kept Shadow Hart horns, Fiona will be able to create the Shadow Helm for 1000GP. |
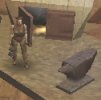 Fiona
the smith likes jokes, but she is a good woman. You can trade with her
(and maybe sell her a few extra weapons...), but you probably won't
be able yet to buy valuable items from her. Don't forget that the new
Appraise skill can help you get better prices.
Fiona
the smith likes jokes, but she is a good woman. You can trade with her
(and maybe sell her a few extra weapons...), but you probably won't
be able yet to buy valuable items from her. Don't forget that the new
Appraise skill can help you get better prices.|
|
 Farghan
and his winter wolf companion have helped the village getting rid of
some kobolds, and he can tell you that most kobolds have run down by
the
Farghan
and his winter wolf companion have helped the village getting rid of
some kobolds, and he can tell you that most kobolds have run down by
the |
6. The Bubbling Cauldron Tavern
You aim is to deliver Mara, whichever way you choose to do so. I tried
a few: Freeing Mara will give you 200XP, plus 50GP from Lodar if no custommer has been killed (or 3 alignements points toward good if you don't take the gold). You can now ask Mara for the berries, which you'll find in a cookpot in the kitchen. You'll also find fish in a barrel and empty bottles, garlic and belladonna in a crate. If you have killed Hurc, don't forget to collect a dagger (vampiric regeneration) on his remains. If you now have the three ingredients, you can bring them back to Ayala and get your reward. Else, go at once to the herborist. |
 When
you step in, you realize in a glance that something wrong is happening
in here. Ask for details by Lodar, the Tavernmaster, and he will explain
to you that Mara the cook is held as a hostage by a bunch of kobolds
barricaded in the kitchen. If you take this quest, you'll have to talk
to the kobold named
When
you step in, you realize in a glance that something wrong is happening
in here. Ask for details by Lodar, the Tavernmaster, and he will explain
to you that Mara the cook is held as a hostage by a bunch of kobolds
barricaded in the kitchen. If you take this quest, you'll have to talk
to the kobold named |
|
 This
place full of commoners is home to three different activities: a small
temple dedicated to Illmater with Gilford as a tired cleric (he can
only trade with you but not heal you), the town Guards Quarters in a
back room, and of course the mayor's place with a few wounded people.
Be careful with the guards' stuff, you'll get points toward chaotic
if you unlock their chests (but you also can find a few potions in them).
This
place full of commoners is home to three different activities: a small
temple dedicated to Illmater with Gilford as a tired cleric (he can
only trade with you but not heal you), the town Guards Quarters in a
back room, and of course the mayor's place with a few wounded people.
Be careful with the guards' stuff, you'll get points toward chaotic
if you unlock their chests (but you also can find a few potions in them).|
When you have fulfilled Piper quest without killing him, you'll get 200XP and Haniah will reward you 60GP. |
 The
mayor Veraunt Shuttlescomb is a frighten old man and he is presently
drunk! The kobolds assault was too much for him and Haniah Dales at
his side is trying to manage, but she has trouble to manage everything.
If you are willing to help, there is a trouble maker called
The
mayor Veraunt Shuttlescomb is a frighten old man and he is presently
drunk! The kobolds assault was too much for him and Haniah Dales at
his side is trying to manage, but she has trouble to manage everything.
If you are willing to help, there is a trouble maker called |
If you kill him, you'll get 5 point toward evil and you'll create a new problem for Haniah as people will be muttering. The only way seems to persuade him (you can try as many times as you wish, though some commoners might follow him after some unsucceeding tries) that he is needed in some other places like Silvermoon or Neverwinter. If you persuade him again that he has no need of money to travel, considering his call, he'll leave for nothing. Else it will cost you 10GP, but he will leave. You can now get back to Haniah to get your reward. |
 Piper
can be found outside, near the south-east gate which leads to the other
part of the village. Some people are listening to him and he is playing
a prophet of doom, threatening his listeners: follow him or you'll die.
Piper
can be found outside, near the south-east gate which leads to the other
part of the village. Some people are listening to him and he is playing
a prophet of doom, threatening his listeners: follow him or you'll die.|
Toman Bross's door in locked, but you can unlock it and get inside.
He cowered while the kobolds were in town, but he has something to say:
a Red Wizard came into town. The mayor was about
to throw him out of town, and the kobolds attacked right before this
wizard got an audience with the mayor. Toman can also tell you that
there is a halflings caravan down the road. Depending of the items you have, Szaren can also propose to buy the Dragon Egg (700GP or Szaren Cloak), the Mask (1000 or1200GP is you are persuasive), the Dragon Tooth (500/700GP) and the Mummified Hand (1000GP). Actually, if you are to sell any of them and you could not help Szaren open his shop, you might want to check the Hermit offers for these too. Mind the other two houses, they are empty, but unlocking their door will get you points toward chaotic. |
 When
you have succeeded in
When
you have succeeded in |
When you return to Katriana with the fortune
cards, she'll give you the key to Daschmaya's. |
 Furtera
and Birgen are brothers, but only the last can talk to you. They were
attacked by the kobolds and Torias chased after them. Katriana leads
this caravan and she presently is tending to her wounded mates. If you
let her know that you are Drogan's apprentice, she'll explain that she
sometimes carries off his messages. She'll also inform you that the
kobolds robbed them of their fortune teller - Daschmaya - 's cards.
Furtera
and Birgen are brothers, but only the last can talk to you. They were
attacked by the kobolds and Torias chased after them. Katriana leads
this caravan and she presently is tending to her wounded mates. If you
let her know that you are Drogan's apprentice, she'll explain that she
sometimes carries off his messages. She'll also inform you that the
kobolds robbed them of their fortune teller - Daschmaya - 's cards.|
If you give her the cards back "free", you'll get a shift
of 3 point toward good, and the telling as well. |
 The
fortune teller can fortell nothing untill you give her back her cards.
Whatever you choose after this, you'll be granted 200XP. If you really
want some money from her as a reward, you'll have to ask it twice and
you'll get 150GP. Else you can listen to what she has to tell you
The
fortune teller can fortell nothing untill you give her back her cards.
Whatever you choose after this, you'll be granted 200XP. If you really
want some money from her as a reward, you'll have to ask it twice and
you'll get 150GP. Else you can listen to what she has to tell you |
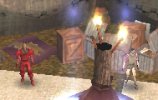
You can test this wizard about the pratice of slavery in Thay, and ask him what he could bring, apart from trade. Then you can discuss the topic with Haniah at the Community Hall, and persuade her that the enclave would help defend the town with its guards, as Szaren promised. She'll agree and you'll get 200XP and 100GP when you give the news back to Szaren. After this he teleports back to Thay in order to get his goods, his slaves and his guards. |
 Standing
near the city door, this man is the Red Wizard
Standing
near the city door, this man is the Red Wizard |
When you enter the house, at least two kobolds are awaiting you. Nora's husband is definitely dead, you don't have to think long to know what to do. Pick up whatever you find on the kobolds remains - there must be a fluospar or an amethyst on them. You can now go upstairs, but maybe you should save your game before that. In the baby's room, a kobold is ready to talk with you. He wants a "shining gem" against the baby. I am afraid that you have only two safe ways to get the baby back: giving him the "gem" (he will take at random an aventurine, an amethist, etc before fleeing through the window), or maybe use persuasion - though I could not succeed with this with the PC I am trying at the moment. If you try to snatch the baby from him, he'll probably kill the baby first, except if your henchman is fast enough (attack mode required). Which will also happen if you take the line of dialog "I'd rather kill you and take the baby". Having the baby killed will get its mother to run away in despair. Else you'll have it in your inventory and Nora will run to you as soon as you get outside. Giving her back her baby will get you 200XP, plus 2 points toward good.
Facing Nora's house is another house which is empty. If you pick up the lock to enter it, you'll get 1 point toward chaotic, and only a small thing in a crate inside the house. |
 When
you get near Blake's house, Nora runs to you, looking for help. Kobolds
are inside her house with her infant Tynan and her husband. The way
you play this little quest might have consequences on your alignment!
When
you get near Blake's house, Nora runs to you, looking for help. Kobolds
are inside her house with her infant Tynan and her husband. The way
you play this little quest might have consequences on your alignment!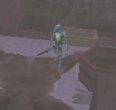 There
again you have several choices (I did not try all of them):
There
again you have several choices (I did not try all of them):|
|
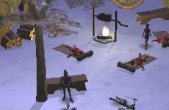
 The
farm looks empty, apart from the tracks that lead downstairs. In the
south-east room nevertheless, there is a mold covered crate which you
must open with care: you need a good saving throw not get disease. Inside
it, you can find
The
farm looks empty, apart from the tracks that lead downstairs. In the
south-east room nevertheless, there is a mold covered crate which you
must open with care: you need a good saving throw not get disease. Inside
it, you can find |
Now, for Daschmaya's caravan to get your reward for bringing her cards back. |
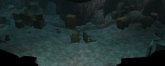 A
single kobold is awaiting you here behind a crate. When you step in
the room, more kobolds will spring from both sides (maybe only two).
Get rid of them and you'll be able to pick up the
A
single kobold is awaiting you here behind a crate. When you step in
the room, more kobolds will spring from both sides (maybe only two).
Get rid of them and you'll be able to pick up the |
Mind that you have reached level 2 before leaving the village - which should be all right if you have fulfilled most of the quests in town. |